Tuesday, July 28, 2015

Handmade Glass Beads

Today I would like to share with you some information about glass beads.

I've been making glass beads since 2005 when I took my first beadmaking class at a bead store in my local area. I was hooked! Below are some of my beads:


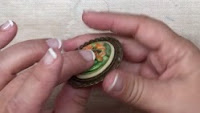
Handmade Glass Beads: Some glass beads are made by a lampwork bead artist. These beads are made one at a time using a mixed fuel torch of propane and oxygen. The glass is wound onto a stainless steel wire called a mandrel that has been coated with bead release. The size of the stringing hole is dependent on the size of the mandrel. They can range from1/16th of an inch up to 2" or more. The beadmaker uses various tools, molds, gravity and color glass to decorate the bead. Once it is finished to the beadmaker's liking, it is placed in a preheated kiln for annealing. Annealing is a process of controlling the rated of cooling which gives the glass strength and durability. After the glass has come to room temperature, the beadmaker then removes the bead from the mandrel and then cleans any remaining bead release from the bead hole. This is usually done with a bead reamer or a diamond grinding bit with a rotary tool. At this point the beads can be sold or made into jewelry.


Handmade Italian Glasss Beads: Some beads are made by glass blowers and are hollow, decorated with color or fine metals such as silver or gold.

Pressed Beads: Another way of manufacturing beads is again by pressing them with a machine. Glass is heated to a molten state and then fed into a machine press with a die that stamps out the bead shape.

Glass beads can also be made by press molds. These are usually made in mass production using a machine or mold where fine glass frit are poured in, then heated to melt the glass. While the beads are still hot, holes are created by plunging a tool into the center of the molten glass.

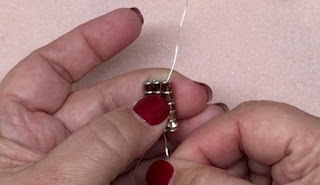
Glass Seed Beads: Glass seed beads are made by trapping a bubble in the molten glass and pulled into a long stringer. The trapped bubble creates the hole in the center of the stringer. Once cool, these are cut into small beads by a machine.

Here is a video produced by Corning Museum of Glass that shows the processes I wrote about above.


When purchasing glass beads for your project(s), it is important to keep in mind just how durable the glass beads need to be, are making an item for yourself or to sell. If your project is for yourself you have a lot more leeway knowing that if the beads break you can repair it. But if you are selling your finished piece you may want to only use annealed beads.

Have you considered making glass beads yourself? In my next post I will write about what it takes to get into the craft. Until then, stay crafty!


Tuesday, June 2, 2015

Swarovski Crystal Slide Pendant


Happy Tuesday everyone! 

Today I am making a Swarovski Crystal Slide Pendant. These pendants are made with Filigree Loop Findings from Eclectica Beads located in Brookfield, Illinois. I came across their beading kits while attending the Bead and Button Show a few years ago. They also have an online store where you can purchase the findings for this project.


For diamond shaped pendant you'll need:

  • 40 - 4 mm Swarovski Bicone Crystals (8 of each color you would like to use)
  • 6 Filigree Loop Findings
  • 28 gauge tarnish free wire
  • 1 flat nose pliers
  • 1 wire cutter


Cut approximately 24" of wire from your spool. String on 1 filigree loop finding, a 4 mm Swarovski crystal, alternating the finding with a crystal between as shown to the left. Both ends will end with the filigree findings.

Now for the next row, beginning with the darkest crystal end, feed the wire back through the end finding, add a dark crystal and then through the next finding. Continue until you reach the other end of the pendant.


Continue in this manner until you have added all of the Swarovski crystals all the way around the pendant.


To finish off the pendant, string the wire back through the next row of findings/crystals.

Next, feed the wire back through the center of the pendant and out between the end crystal. Pull the wire tight.


Snip the wire with wire cutters or shears as close to the pendant as possible. If needed, push the wire back into the center of the pendant.


String onto your favorite chain or cord.


To watch me make this pendant, check out the video below.


Thank you for visiting! Below, please find links to supplies I used in this project. If you have any questions or comments, please leave them below or send me an e-mail on the "Contact Us" tab above.

Have a crafty week!


Monday, June 1, 2015

Update and Sneak Peek for tomorrow

Update: You might have noticed that I had missed a few weeks, I apologize but have good reasons.

For Mother's Day, my family and I went to San Antonio, Texas to surprise my mother-in-law (MIL) for Mother's Day. Boy was she surprised!

The plan was for my sister-in-law to take my MIL out to lunch for Mother's Day. But when they arrived, my husband was waiting with the restaurant door open. At first she wasn't sure that it was her son at the door, but once she saw him she was nearly in tears. She told us it was the best Mother's Day gift should could have received. It sure makes me happy to make her happy.

When we returned home, we hit the ground running. My family is of Portuguese decent, each year, six weeks after Easter, we celebrate a Portuguese Holy Ghost Festa. You can read more about the tradition here. My family has been involved in this tradition since coming to the U.S. four generations ago.

I decorate the chapel on the Saturday before the event (See the photo to the left) by making bouquets of flowers, placing cloths over the alter and positioning religious statues.


Then on Sunday,  volunteer in the outdoor auction to help raise money so that the buildings can be maintained, cover cost of the next year's celebration, etc. It's a long weekend and a lot of work, but part of my heritage I'm very proud of.  In the photo on the right, my long time, dear friend Brenda (R) and I (L) are holding up a handmade quilt being auctioned.  Brenda and I have been friends since the 5th grade. Our moms were friends and we did everything together.

Unfortunately after both of those events, I got a cold that turned into bronchitis. I'm still recovering from the last few symptoms but I feel 95% better.

Sneak Peek for Tuesday, June 2, 2015

Please join me again tomorrow when I will be making Swarovski Crystal Slide Pendants. Here is a sneak peak at the finished pendants. They're a lot easier than they look and get a lot of compliments.

Have a great Monday and I'll see you soon!


Wednesday, May 13, 2015

More Hero Arts News

Earlier this week I shared with my readers about my recent visit to the Hero Arts Factory Store in Richmond, California. I recently received an e-mail from Hero Arts telling me about a meet-up on Wednesday afternoons.   Share ideas, techniques and inspiration with new and old friends while you make cards, scrapbook and/or work on any other crafting projects.  There will be some Hero Arts products out for you to play with!  So bring your WIPs (works in progress) and come have some fun. Their first meet-up starts on Wednesday, May 13 from 1 pm to 5 pm.


Have you always wanted to learn how to make a shaker card?  Well the time is now!  Martha and Terry will be showing you how to do just that in their next class on June 1 from 1 pm to 3 pm.  The cost is $25 for an entertaining afternoon.

Don't those events sound like fun to you? They sure do to me, I'm planning on making a visit again soon.

Have a great week!

Tuesday, May 12, 2015

A Visit to Hero Arts Factory Store


On Monday and Wednesdays of each week, Hero Arts opens their factory store to the public. Recently I visited, I always find the Hero Arts staff very friendly and inviting. It is fun to look through boxes of product that have been marked down to great prices, some items don't have their full retail packaging, but thats ok with me! 
Hero Arts Factory Store is located at: 
1200 Harbour Way S,
Richmond, CA 94804

Here is a short video of what I picked up.


Tuesday, May 5, 2015

Cabochon Pendant

This week I am making a Pendant using a handmade glass cabochon, a pendant finding, seed beads and Crystal Clay.

For those who do not know what a cabochon is, it is a bead that has a flat back and does not have holes in the bead. They come in many different materials such as stone, glass and crystal and in a variety of shapes.

In this project I am using a lamp worked glass cabochon that I made by melting glass in a torch onto a cabochon mandrel coated with bead release. The bead release does just as it sounds, it releases the glass from the mandrel after it has slowly cooled in a kiln. The cooling process is called annealing and is done in a kiln with a digital controller to bring the glass down from melting temperatures to 740 degrees, it then holds the temperature at 740 for at least 30 minutes before it begins to slowly ramp down to room temperature. This usually happens over night and the beads are ready to be cleaned and inspected the following day. Glass cabochons can be purchased from Half Moon Beads. Stone, metal or crystal cabochons can be used as well.

Preparing Crystal Clay

The first step is to mix equal parts of part A (color) and part B (hardener) of Crystal Clay until it is thoroughly combined making sure that there are no streaks of one color in the clay.


Next, I roll the mixed clay into an oval shaped ball and place it into the bezel setting, spreading it out. If clay accidentally gets pushed beyond the bezel setting, it's easy to move it back into place by pushing it with your fingers.


The inside bezel should now be covered with Crystal Clay. Smooth out the clay until it is evenly distributed throughout the bezel and there are no lumps in it.


The next step is to push the cabochon into the clay until the clay pushes out around the cabochon. This will help keep the cabochon in the clay after it is dry.


Circling Cabochon with Seed Beads

Now it's time to add seed beads around the cabochon, covering up the clay.

First string seed beads onto beading thread using a beading needle until you have enough to go around the outside of the cabochon.


Before tying the thread, measure around the cabochon with seed beads to make sure the beads will completely cover around the cabochon. Add or remove seed beads as needed.


Sew through the beads with the beading thread until you reach the tail to create a circle.

Tie a knot in the thread using a surgeon's knot.


Push the circle of seed beads into the Crystal Clay around the cabochon, until they are securely embedded into the clay.


Cut the excess thread and clean up any displaced clay using a dental tool or toothpick.


Tuesday, April 28, 2015

Spring Garden Stakes

Today I am making Garden Stakes for my Spring Garden. These were very, very easy to make, but add some color to the garden. 


In the video I am showing you galvanized metal, oval garden stakes but I do not have a link to them to purchase online. They can be purchased at your local Michaels Stores. I did link to similar garden stakes sold by Joann's made from wood. 


Also, I linked below the pens I used in the video. I also made mention to the ribbon I purchased at the Michaels Store and used in the video were available for .99 per 25 yards. Unfortunately, these too are only available in their stores at .99 cents, the links below are sold online for $1.79.


View blog post for supplies


Finished Garden Markers in my freshly planted garden. 


Also, it rained last night and the titles still look great today. The ribbon dries quickly in the sunshine. 

Tuesday, April 21, 2015

Travel Journal

Today I am creating a travel journal. Once the basic journal design is made, it can be used to make any type of journal you would like. Some great ideas would be a grandma brag book, Mother's Day gift, thank you gift for a coach, etc. You get the idea. 

You will need:
  • 3 sheets of coordinating 12" x 12" cardstock. 
  • Permanent adhesive
  • Stickers
  • Photos
  • Coordinating paper
To make the mini album:
  1. Cut the 12" x 12" cardstock at 6", you will end up with six sheets of 12" x 6" cardstock. Choose one cardstock design to make into the album cover.
  2. Trim 1/4" off of the remaining 12" x 6" sheets of cardstock so that you will now have five pieces of cardstock that measure 12" x 5-3/4".
  3. Now trim one of the 12" x 5-3/4" sheets of cardstock that match the cover to 5" x 5-3/4".
You should now have cardstock pieces:
  • One 12" x 6" (Cover base)
  • Three 12" x 5-3/4" (Inside Pages)
  • Two 5" x 5-3/4" (Cover extensions)
Score the 12" x 6" piece at 3" and 2-1/2" from each end of the cardstock.


Score the three 12" x 5-3/4" pieces at 3" from each end.


Using permanent adhesive, adhere the 3 scored and folded pieces of the inside pages (12" x 5-3/4") so that it will look like the photo below.


Here is a short video of the completed journal ready for photos and decorations


To watch me make the journal and see it finished, please watch my YouTube video: 


Below, please find a list of supplies I used in the video. If you have any questions or comments, please leave them here. 

If you like my video and would like to see more, please subscribe!  Thanks for watching and I hope to see you next week!