Tuesday, March 31, 2015

Crystal Cluster Earrings

Thank you for visiting, this week we are making Crystal Cluster Earrings shown here:  
Watch in the video below how I made these earrings.  


Would you like to win these earrings? I am raffling them off to 1 random winner. To enter, please complete the following entry: 

The raffle is open from today, March 31, 2015 12:00 a.m. through Monday, April 6, 2015, 9:00 a.m. pst. Winners will be announced here and contacted via e-mail. 

a Rafflecopter giveaway


View blog post for supplies

This earring design can easily be changed to match your favorite outfit by choosing different beads, color wire and earring findings. Enjoy!

Update! Unfortunately my blog is too new and I didn't have any entries for the earrings. I will hold another giveaway soon.  

Tuesday, March 24, 2015

Secret Garden Postcard

I don't know about you, but I have loved coloring ever since I can remember, so why stop now? I came across "Secret Garden: An Inky Treasure Hunt and Coloring Book."


The book has many pages of flowers, gardens, creatures and rambling vines hand drawn by the author just waiting for you to color them in and making them your own. Space is also provided for your continue your own drawings on some of the pages.

Here are a couple of pages I have worked on using gel pens.


My initial thought was to use Copic Markers to color the pages because I love the ability to blend the colors, but I soon discovered that the paper is very porous and the ink is absorbed onto the back of page.

Next I tried gel pens.  The first set of pens I purchased were Fiskars Gel Pen, 48-Piece Value Set. They work great, but some of the neon inks seem to clog up at the tips, but the glitter and metallic pens worked great, plus they're my favorite. When I started to run low on the Fishers' pens I gave Sakura Gelly Roll Metallic Gel Pen Set a try and they were a dream to use. I wish I had purchased the larger  Sakura 64-Piece Gelly Roll Set.

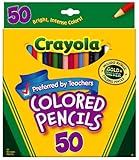
In the video below, I used Crayola 50ct Colored Pencils to color a postcard from the Secret Garden Postcard book. I also used Gambol Oil to blend and shade the colors.


Here is the finished postcard.


Supplies used in this project:


Monday, March 16, 2015

Indoor Fairy Garden

Today I share with you the indoor Fairy Garden I made for the entry way of my home.

I purchased a shallow terra cotta planter from my local nursery, filled it with top soil, arranged my furniture and initially, planted real plants in it, but quickly found out that my entry way did not provide enough light for the plants to thrive.


To the left is a photo of my first attempt. It was cute, but lacked pizzazz, it required maintenance, which I wasn't interested in that undertaking. 

So I went back to the drawing board. I removed the now dead plants and purchased silk plants, pebbles and moss from Joann's Fabrics. 


To me the original black metal arbor was lacking something. 


One of my favorite looks for the garden is wisteria hanging from an arbor, so I thought fairies might like it too. I purchased a wisteria looking faux plant, cut all of the tips off then wire wrapped them to the arbor. I started from the sides and worked my way inward. 


Next I placed the SuperMoss on top of the soil and secured it with a couple of pieces of wire approximately 2 inches long, bent in half. 

I then started placing the arbor, furniture, pebbles to create a garden path. A couple of rocks here and there. 


Next it was time for some color. I used mini picks of silk flowers from Joann's, cut off the individual stems and placed them throughout the outer edge to give it the feel of a secluded garden. I had some glass pumpkin, mushrooms and flowers head pins I made to the garden. 


I'm planning on making more in different themes, such as a beach scene with sand, seashells, etc. I've also seen Fairy furniture for camping and tea parties. I think the possibilities are endless. 


For those who enjoy making glass beads, my initial thought was to create objects to go in my fairy garden out of glass. 


For non-glass bead peeps, there are a lot of items available commercially, below is a list of items to get you started. Also, you can create your own items with twigs and rocks you find in the garden. Either way, I'd love to see what everyone else makes, please share your creations with me!


View blog post for supplies

Thursday, March 12, 2015

You've Been On My Mind


I've been making cards to send to my niece who is away at Army Boot Camp. Today I made the card above.

I used the Simon Says Stamp Flowers on My Mind Stamp Set

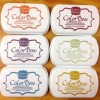
First I used Color Box's Artichoke by Stephanie Barnard to stamp in the stems and leaves onto Neenah Polar White Cardstock. 


Then I used Sky to stamp the large and medium flowers, banana and mustard in the center of the blue flowers. I then I used the three dots to give the idea of small yellow flowers in the background.

Finally I stamped the sentiment "you've been on my mind" in the upper right corner.


Next I trimmed the edges of the card to allow for a light blue background to frame the floral.


I wanted to keep this card flat, so I used Tombow Permanent Tape Runner to adhere the stamped card to a light blue card base that measures 5-1/2 x 4-1/4".

Next, I cut two pieces of yellow ribbon, one 6-1/2 " long and a second 3-1/2" long.  I tied the short length of yellow ribbon around the longer length of ribbon then again using Tomboy Permament adhesive I secured it to the right side of the light blue base next to the stamped card stock and wrapping the long ribbon around and securing it to the back.

Cut a piece of Neena Solar Yellow card stock in half so that it measures  a 11" x 4-1/4". Score the card base at the 5-1/2" (or half way point), fold in half then adhere the light blue decorated card front to the card base.


Friday, March 6, 2015

Coffee Cozies and Matching Gift Tags

Today I would like to share with you a coffee cup cozy and gift tag. These are perfect for  upcoming holidays and such as Secret Santa gifts, stocking stuffers or a little something that could be added to a coffee gift basket.

I made the tag by using the Stamps of Life Coffee Cup Dies by cutting out the lid by lining up the green paper along the top of the die, then stamping it with Stamps of Life matching Coffee4Two cup stamp by only inking the top of the stamp in  I then cut out a full Coffee Cup Die using craft card stock. I then used the "Love You A Latte" Stamps from Lawn Fawn to stamp the sentiment 'for you" using VersaMark Watermark Stamp Pad and heat emossed it with white embossing powder. I then stamped the "to and from" using Birthday Tags from Simon Says Stamp.

The coffee cozy was made using Paper Tray Ink's Coffee Cozy Dies and Coffee Cozy Details. I first cut out the coffee cozy, the tree detail die and then the tree hole punch die directly onto the coffee cozy. By doing this, it allows me to sew through the felt material using a  This allows me to attach the tree cut out directly to the front of the cozy.  stitched it together using dark brown embroidery floss using a running stitch. Before finishing up the right side, I included in the tree tag in the seam before sewing it up.


View blog post for supplies