Showing posts with label lampworking. Show all posts

Tuesday, July 28, 2015

Handmade Glass Beads

Today I would like to share with you some information about glass beads.

I've been making glass beads since 2005 when I took my first beadmaking class at a bead store in my local area. I was hooked! Below are some of my beads:


Handmade Glass Beads: Some glass beads are made by a lampwork bead artist. These beads are made one at a time using a mixed fuel torch of propane and oxygen. The glass is wound onto a stainless steel wire called a mandrel that has been coated with bead release. The size of the stringing hole is dependent on the size of the mandrel. They can range from1/16th of an inch up to 2" or more. The beadmaker uses various tools, molds, gravity and color glass to decorate the bead. Once it is finished to the beadmaker's liking, it is placed in a preheated kiln for annealing. Annealing is a process of controlling the rated of cooling which gives the glass strength and durability. After the glass has come to room temperature, the beadmaker then removes the bead from the mandrel and then cleans any remaining bead release from the bead hole. This is usually done with a bead reamer or a diamond grinding bit with a rotary tool. At this point the beads can be sold or made into jewelry.


Handmade Italian Glasss Beads: Some beads are made by glass blowers and are hollow, decorated with color or fine metals such as silver or gold.

Pressed Beads: Another way of manufacturing beads is again by pressing them with a machine. Glass is heated to a molten state and then fed into a machine press with a die that stamps out the bead shape.

Glass beads can also be made by press molds. These are usually made in mass production using a machine or mold where fine glass frit are poured in, then heated to melt the glass. While the beads are still hot, holes are created by plunging a tool into the center of the molten glass.

Glass Seed Beads: Glass seed beads are made by trapping a bubble in the molten glass and pulled into a long stringer. The trapped bubble creates the hole in the center of the stringer. Once cool, these are cut into small beads by a machine.

Here is a video produced by Corning Museum of Glass that shows the processes I wrote about above.


When purchasing glass beads for your project(s), it is important to keep in mind just how durable the glass beads need to be, are making an item for yourself or to sell. If your project is for yourself you have a lot more leeway knowing that if the beads break you can repair it. But if you are selling your finished piece you may want to only use annealed beads.

Have you considered making glass beads yourself? In my next post I will write about what it takes to get into the craft. Until then, stay crafty!


Tuesday, May 5, 2015

Cabochon Pendant

This week I am making a Pendant using a handmade glass cabochon, a pendant finding, seed beads and Crystal Clay.

For those who do not know what a cabochon is, it is a bead that has a flat back and does not have holes in the bead. They come in many different materials such as stone, glass and crystal and in a variety of shapes.

In this project I am using a lamp worked glass cabochon that I made by melting glass in a torch onto a cabochon mandrel coated with bead release. The bead release does just as it sounds, it releases the glass from the mandrel after it has slowly cooled in a kiln. The cooling process is called annealing and is done in a kiln with a digital controller to bring the glass down from melting temperatures to 740 degrees, it then holds the temperature at 740 for at least 30 minutes before it begins to slowly ramp down to room temperature. This usually happens over night and the beads are ready to be cleaned and inspected the following day. Glass cabochons can be purchased from Half Moon Beads. Stone, metal or crystal cabochons can be used as well.

Preparing Crystal Clay

The first step is to mix equal parts of part A (color) and part B (hardener) of Crystal Clay until it is thoroughly combined making sure that there are no streaks of one color in the clay.


Next, I roll the mixed clay into an oval shaped ball and place it into the bezel setting, spreading it out. If clay accidentally gets pushed beyond the bezel setting, it's easy to move it back into place by pushing it with your fingers.


The inside bezel should now be covered with Crystal Clay. Smooth out the clay until it is evenly distributed throughout the bezel and there are no lumps in it.


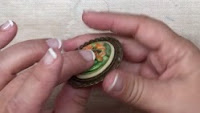
The next step is to push the cabochon into the clay until the clay pushes out around the cabochon. This will help keep the cabochon in the clay after it is dry.


Circling Cabochon with Seed Beads

Now it's time to add seed beads around the cabochon, covering up the clay.

First string seed beads onto beading thread using a beading needle until you have enough to go around the outside of the cabochon.


Before tying the thread, measure around the cabochon with seed beads to make sure the beads will completely cover around the cabochon. Add or remove seed beads as needed.


Sew through the beads with the beading thread until you reach the tail to create a circle.

Tie a knot in the thread using a surgeon's knot.


Push the circle of seed beads into the Crystal Clay around the cabochon, until they are securely embedded into the clay.


Cut the excess thread and clean up any displaced clay using a dental tool or toothpick.


Tuesday, September 23, 2014

Welcome!

I have been dabbling in paper crafts for years and put it all away for a while when I got interested in making jewelry, then into lampworking (melting rods of glass over a mixed fueled torch onto a stainless steel mandrel coated with bead release to make glass beads).  The photo at the left is a necklace I made. The colorful flowers and leaves are made of glass then they were wire wrapped onto copper foundation forms to make a bright statement necklace.

Recently my family has gone through some illnesses that require me to be able to drop everything and attend to them at a moments notice. Unfortunately glass work requires uninterrupted time to finish a bead before it can be placed into a glass kiln to be annealed.

With paper crafts I am able to leave immediately, then to return to my project when I have time. I have found that I am getting a lot of joy out of creating cards and some free-hand drawing. 

It's just mid-September and I am already done making my Christmas Cards for the year. Here is a peek of one of my prototype Christmas cards.


I still need to address them and write to friends and relatives who live far away, but I am confident I will have time to get them done in plenty of time.